Setting Up Hushmail - iPad
Please note: When sending mail from a third-party mail client, your copy of the message will be saved in your Sent folder as encrypted, even if the message is sent as non-encrypted. By default, any mail sent via SMTP from a third-party mail program will be sent as non-encrypted, unless the recipient is a Hushmail customer or has previously set a passphrase for receiving encrypted email.
Tip: Hushmail for iPhone, available in the App Store, is the best way to access your Hushmail account on iPhone and iPad.
Setting up Hushmail on iPad
1. Click Settings on your tablet, as shown here:

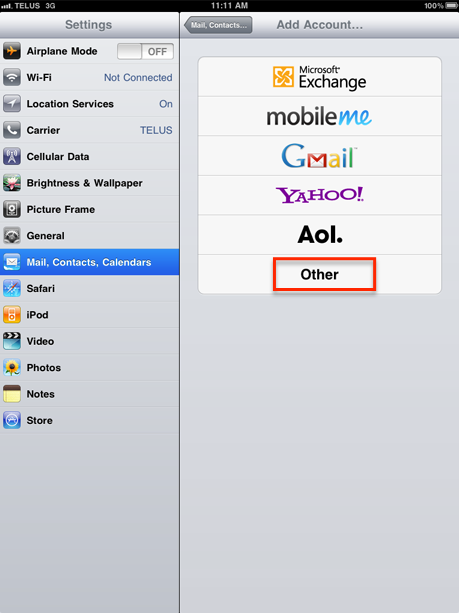
2. Tap Mail, Contacts, Calendars then tap Add Account, as shown here:

3. Tap Other, as shown here:
4. Tap Add Mail Account, as shown here:

5. Enter your account information, as shown below, then click the blue Next button.
- Name: your name
- Address: your full email address
- Password: your passphrase
- Description: a description for this account

6. Select IMAP and enter the following server settings:
Incoming Mail Server
- Host Name: imap.hushmail.com
- User Name: your full email address
- Password: your passphrase
Outgoing Mail Server
- Host Name: smtp.hushmail.com
- User Name: your full email address
- Password: your passphrase

7. When you have finished, click the blue Next button.
8. Select On for the Mail setting as shown below, then click the blue Save button.

9. Your account should now be setup!