Setting up Hushmail - Android
Please note: When sending mail from a third-party mail client, your copy of the message will be saved in your Sent folder as encrypted, even if the message is sent as non-encrypted. By default, any mail sent via SMTP from a third-party mail program will be sent as non-encrypted, unless the recipient is a Hushmail customer or has previously set a passphrase for receiving encrypted email.
Tip: These instructions are for configuring IMAP on a Samsung Galaxy S7 with Android 6.0. If you are using a different Android smartphone or operating system version the server settings are the same but the process might be slightly different. You can also use their mobile site, m.hush.com, to access your Hushmail account on your Android smartphone.
Setting up Hushmail on Android
1. From your Applications menu, open the Email application and tap Add Account.
2. Type in your full email address and your passphrase, then tap Manual Setup, as shown here:

3. Next, you will be asked to select an account type. Tap IMAP Account, as shown here:

4. Enter the following incoming server settings:
- User name: your full email address
- Password: your passphrase
- IMAP server: imap.hushmail.com
- Security type: SSL
- Port: 993

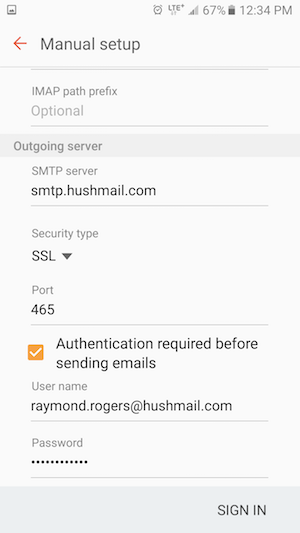
5. Scroll down to see Outgoing server and enter the following settings:
- SMTP server: smtp.hushmail.com
- Security type: SSL
- Port: 465
- Authentication required before sending emails: checked
- User name: your full email address
- Password: your passphrase
6. Tap Sign in at the bottom of your screen.
7. Your account should now be setup!